Lesson 2
Making a Scene
In which we discuss how Panda organises its scene, and learn how to load and manipulate models.
This lesson is a bit long, but don’t let that intimidate you! Most of the stuff covered here is fairly straightforward, but calls for some explanation, I feel.
To understand how models are handled in a Panda3D scene, and especially how they’re manipulated, let us discuss how Panda3D arranges its scene.
Panda3D stores its objects in a “scene graph”. Essentially, this is a hierarchy of objects–called “nodes”.
You can imagine this heirarchy as looking a bit like a baby’s mobile, with nodes hanging by strings from the nodes above them, and a single “root-node” at the top, to which they’re all, ultimately, attached.
This relationship between objects is referred to as a “parent-child” relationship: for a given node, the node above is its “parent”, and any nodes below are its “children”.

Furthermore, the state of a given node–such as its position, or scale–is relative to that of its parent. That is, a position of “zero” means “at the same location as its parent”; a rotation of “zero” means “facing the same way as its parent”; and so on. Thus each node affects its child-nodes, and their children, and so on.
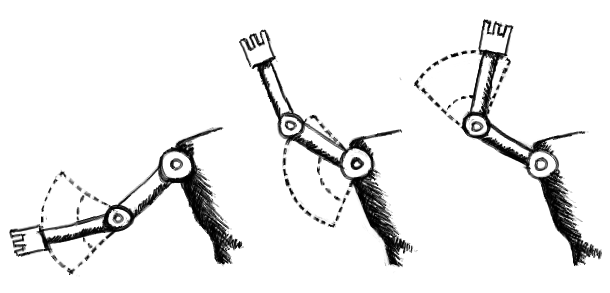
You can think of it as being a bit like the arm of an articulated figurine: moving the lower arm results in effectively no change to the upper arm. However, moving the upper arm results in the lower arm being moved accordingly. Furthermore, if the upper arm is rotated to point upwards, the lower arm likewise points up, and any rotations of the lower arm are relative to that orientation.

However, most of the time we don’t interact directly with nodes. Instead, we work with an intermediary called a “NodePath”. This essentially describes a route through the scene-graph from the root to the node in question. It’s even possible to have more than one distinct NodePath for a single node.
For practical purposes, however, NodePaths can be considered to be nearly–but not quite–the same as nodes: most of what you can do with a node, you can do with a NodePath (and more conveniently). Furthermore, NodePaths contain a reference to their node, should you want to access that.
So, all that said, let’s actually load some models.
In the “Models” folder, you should find a file named “environment.egg”. The “.egg” suffix indicates that it’s in Panda’s human-readable file-format. Panda will automatically convert this to its other file-format, “.bam”, which is more efficient, but not easy for humans to read.
Panda3D provides a number of globally-accessible variables, and one of these is “loader”, the object used to load a number of different types of object–including non-animated models.
To load the file, we simply add the following code to our “__init__” method:
loader.loadModel("Models/Misc/environment")Note that I don’t include the “.egg” suffix above. I could, but Panda3D will load the file perfectly happily without it. What’s more, when we distribute games we usually distribute “.bam” versions of our models instead of “.egg”, and leaving out the suffix in the code allows Panda to automatically detect which to load.
However, the model won’t yet show up if we run the program: we’ve loaded it, but we haven’t actually attached it to the scene-graph. To do so, we “parent” it to a NodePath that’s already in the scene-graph–that is, make it a child of that NodePath.
In this case, we’ll simply attach it to the root of the scene-graph. This NodePath is automatically provided by Panda, and accessible in another global variable named “render”.
self.environment = loader.loadModel("Models/Misc/environment")
self.environment.reparentTo(render)
If you run the code now, you should see the environment model in the scene. It looks a bit flat–but we’ll get to that…
Next, let’s load an animated model. In Panda3D these are called “Actors”, and aren’t loaded via the “loader” object. Instead, we create a new “Actor” object, and pass into its constructor the relevant model-file and animation-files
Specifically, we first pass in the file for the model itself, and then pass in a Python dictionary, associating names for animations with the animation files that define those animations.
# In your import statements:
from direct.actor.Actor import Actor
# In the body of your code--"__init__" will do for now:
self.tempActor = Actor("Models/PandaChan/act_p3d_chan", {"walk" : "Models/PandaChan/a_p3d_chan_run"})
self.tempActor.reparentTo(render)Similar to the “environment” model, “act_p3d_chan” and “a_p3d_chan_run” are “.egg” files found in the “Models/PandaChan” folder.
There is a caveat here: While models can be loaded and allowed to fall out of scope, Actors will not animate properly if this happens. Keep a reference to your Actors as long as you’re using them!
Now, if we run the code above, we still won’t see the character!
This time it’s not that we haven’t attached it to the scene-graph. Instead, it’s simply that it’s located at position (0, 0, 0)–which is the default position of the camera. (The environment is visible because it’s big, and has inward-facing walls.)
Which brings us nicely to handling the position, rotation, and scaling of our objects.
These are achieved quite simply, via a suite of methods provided by NodePath: For setting an object’s position, we have “setPos”. For scale, we have “setScale”. For rotation, we have “setHpr”.
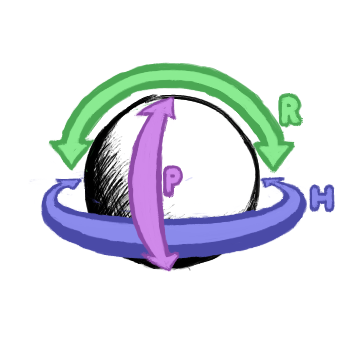
That last perhaps calls for some explanation. In short, “H”, “P”, and “R” here refer to “Heading”, “Pitch”, and “Roll”, as in an aircraft. “Heading” is turning to the left or right–that is, around the “z”-axis. “Pitch” is rotation up and down–that is, around the “x”-axis. Roll is tilting to the left or right–that is, rotation around the “y”-axis.

(And there are a variety of other, more-specific versions of the above methods, too. For example, you can set just the x-position by calling “setX”, or just the roll by calling “setR”, and so on.)
So, let’s move the Actor to where we can see it. The camera by default looks in the positive y-direction, so we’ll move it to a position on the y-axis:
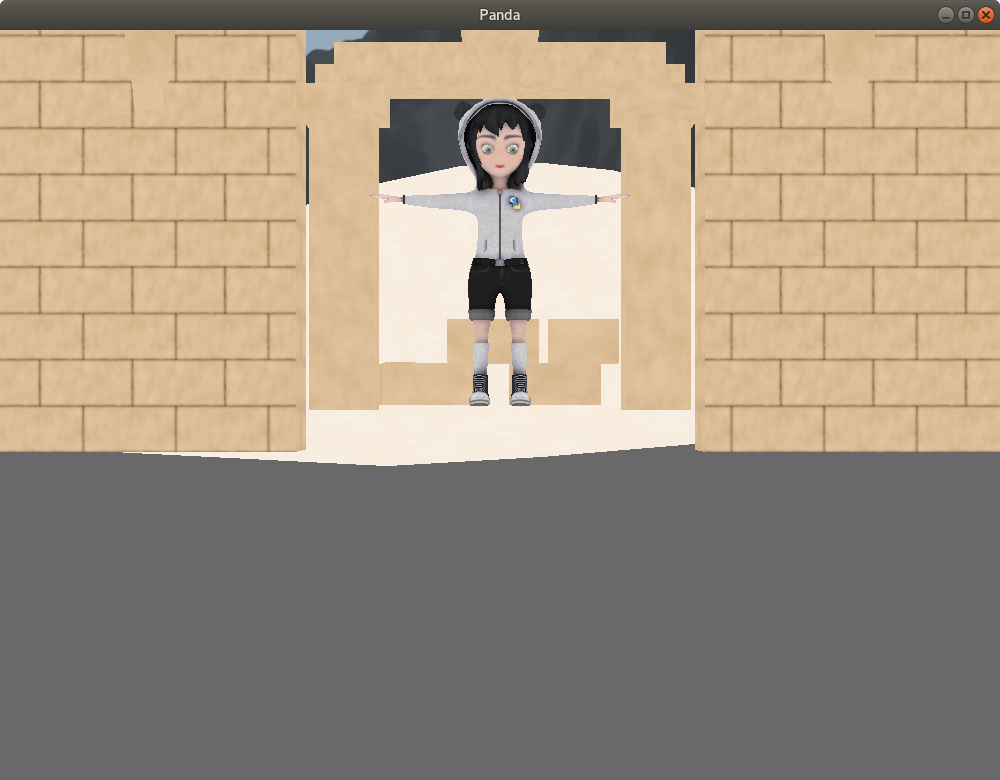
self.tempActor.setPos(0, 7, 0)You should now see the Actor framed in the doorway of the environment model!

By the way, sometimes you’ll get a model that doesn’t face the direction that you intend. You could just rotate the model’s NodePath–but that may complicate any rotations that you want to do later. As it happens, models aren’t usually loaded as single nodes, but rather tend to have at least one child-node containing the models themselves. (This applies to both Actors and non-Actors.) Thus you can access this child-node, and rotate it, like so:
self.tempActor.getChild(0).setH(180)With the Actor visible, let’s animate it. We have a few options here, but the most fundamental are to either “play” the animation (that is, run through it once), or “loop” it (that is, run it over and over again, until we tell it to stop). Let’s do the latter:
self.tempActor.loop("walk")You should now see Panda-chan running in place.
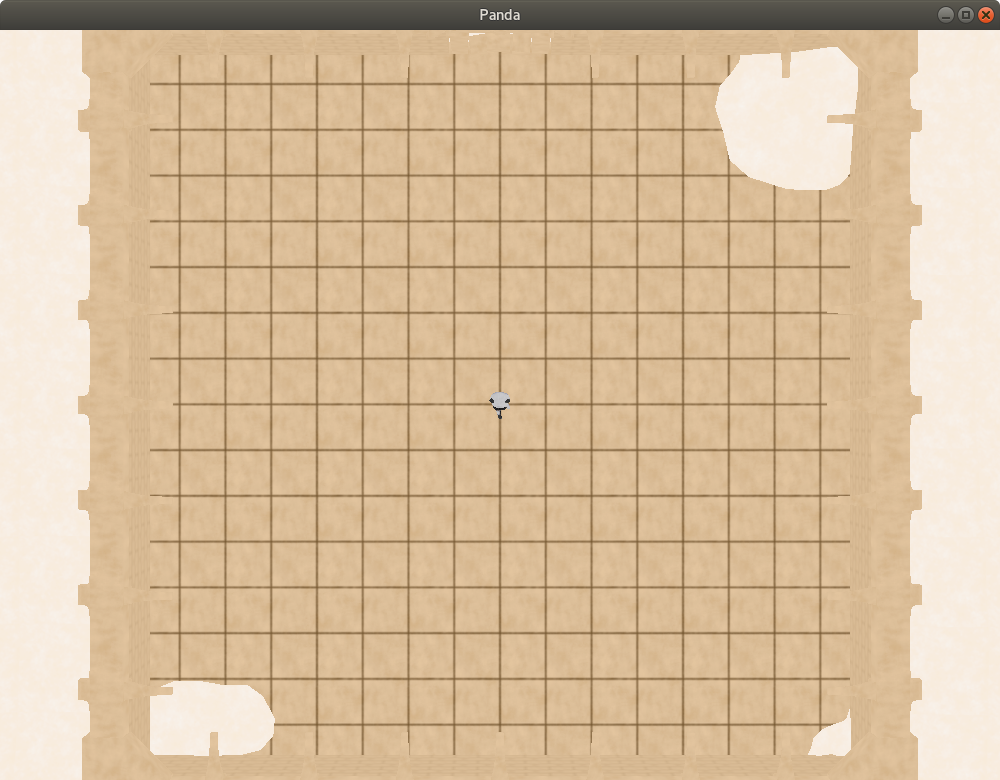
Now, we’re making a top-down game, so instead of placing the character so that we can see it, let’s place the camera so that we’re looking down on our scene. The camera is itself a node in the scene-graph, so we can move it just as we can move any node.
And once again, Panda3D provides some variables providing access to the default camera, including one referencing a NodePath for it, named “camera”.
Remove the call to “setPos” that we added above (returning the character to the centre of the scene), and instead add this:
# Move the camera to a position high above the screen
# --that is, offset it along the z-axis.
self.camera.setPos(0, 0, 32)
# Tilt the camera down by setting its pitch.
self.camera.setP(-90)
But it still all looks so flat. Let’s fix that…